Selasa, 10 Juli 2018

MELIHAT PROSES BAGAIMANA ORANG PAPUA MEMBUAT SAGU


Pohon aren atau enau tumbuh di lereng-lereng pegunungan. Sedangkan pohon rumbia tumbuh di dataran rendah yang banyak airnya. Pohon yang memiliki batang mirip pohon kelapa ini batangnya mengandung empulur yang bisa menghasilkan tepung yang bisa mengenyangkan perut seperti nasi.

Pohon Aren

Aren yang memiliki nama ilmiah Arenga pinnata ini termasuk tanaman serbaguna. Daun dan ijuknya bisa digunakan sebagai atap rumah. Buahnya menghasilkan kolang-kaling. Tandan buahnya bisa disadap niranya untuk diolah menjadi gula merah. Kulit batangnya yang keras biasa digunakan untuk bangunan rumah. Sedangkan empulur di dalam batang aren bisa menghasilkan tepung. Tepung aren bisa diolah menjadi bubur, mi, kerupuk, kue-kue, dan bakso. 

Tepung aren menghasilkan adonan yang kenyal. Petani sering mengolah tepung aren menjadi penganan atau mi yang bisa mengenyangkan perut.

Untuk membuat tepung aren, batang pohon aren ditebang dan dipotong-potong. Potongan batang aren dibelah dan diambil empulurnya. Empulur aren mengandung sel-sel parenchym yang menyimpann tepung. Untuk mengeluarkan tepung, empulur harus dihancurkan dengan cara diparut.

Hasil parutan empulur aren lalu disiram dengan air sambil dipisahkan dari serat-seratnya. Air tersebut akan melarutkan tepung dan mengendapkannya di dalam bak penampungan. Setelah tepung mengendap, airnya dibuang, dan tepungnya dijemur hingga kering.

Pohon Rumbia

Orang sering menyebutnya pohon sagu. Padahal aslinya bernama pohon rumbia atau Metroxylon sagu. Seperti pohon aren, manfaat pohon rumbiajuga cukup banyak. Daunnya lazim digunakan untuk atap rumah dan batangnya untuk kayu bakar. Di daerah Maluku dan Papua, pohon rumbiamenjadi tanaman andalan karena menghasilkan tepung sagu.

Untuk membuat tepung sagu, empulur yang terdapat di dalam batang sagudiparut dan disiram dengan air agar zat tepungnya larut dan mengendap di dalam wadah penampungan. Tepung sagu bisa langsung diolah menjadi bubur, tetapi bisa juga diawetkan dengan cara dikeringkan.

Tepung sagu bisa diolah menjadi kue-kue, bubur, mi, kerupuk, dan bakso. Pada zaman dahulu di daerah Maluku, orang belum merasa kenyang kalau belum makan bubur sagu atau papeda.
http://bobo.grid.id/

Pohon aren atau enau tumbuh di lereng-lereng pegunungan. Sedangkan pohon rumbia tumbuh di dataran rendah yang banyak airnya. Pohon yang memiliki batang mirip pohon kelapa ini batangnya mengandung empulur yang bisa menghasilkan tepung yang bisa mengenyangkan perut seperti nasi.


Teras batang sagu yang ditokok (dicacah) itu nantinya akan berupa ampas yang bisa dibuat menjadi tepung sagu.

Sementara Mama Angelina Kladit sudah siap-siap membawa karung untuk membawa ampas hasil panen. Setelah terkumpul satu karung, ia membawanya ke tempat meramas sagu, tidak jauh dari tempat menokok.

Di sana sudah ada alat untuk meramas ampas batang sagu, alat yang sederhana dari batang kayu.

Ampas yang sudah dikumpulkan disiram pakai air lalu diremas, berkali-kali, sambil disaring. Hasil ramasan dibiarkan mengendap.

Pati hasil ramasan kemudian diambil untuk dijadikan tepung sagu dan diolah menjadi beragam makanan.

Sagu basah dibawa dari hutan untuk diproduksi menjadi berbagai produk makanan. 

Kini, tepung sagu tidak lagi hanya diolah menjadi papeda (bubur sagu, makanan pokok mereka) atau dijadikan sagu kering untuk dijual.

Biasanya, sagu kering dijual hanya sekitar Rp200 ribu untuk satu tuman atau karung yang isinya 15 kilogram hingga 20 kilogram.

Warga Kampung Sira sudah mulai mengolah sagu menjadi berbagai jenis olahan lain, seperti mi, kue, keripik, dan cendol.

Sagu memang berlimpah di hutan mereka, tetapi selama ini belum bisa meningkatkan perekonomian warga secara signifikan.

"Harapannya dari sagu yang kami olah, penghasilan menjadi bertambah," kata Ketua Lembaga Pengelola Hutan Desa (LPHD) Alfred Kladit saat menemani kami ke hutan.

Alfred baru Desember tahun lalu mendapat pelatihan mengolah sagu menjadi beberapa alternatif makanan. Ia dan beberapa warga dikirim oleh organisasi lingkungan Greenpeace ke Sungai Tohor, Kabupaten Kepulauan Meranti, Riau, yang dikenal dengan produk sagunya hingga ke Malaysia dan Singapura.
Belajar mengolah sagu

Hutan di Kampung Sira merupakan bagian dari Hutan Desa Manggroholo-Sira, Sorong Selatan. Warga Kampung Sira berhak atas 1.850 hektar.

Setelah mendapatkan hak Hutan Desa sejak setahun lalu, yang merupakan Hutan Desa pertama di Papua, mereka berupaya meningkatkan perekonomian dari hasil-hasil hutan, termasuk dari sagu.

Mereka berharap bisa mengikuti jejak masyarakat Sungai Tohor, Riau, yang sudah berhasil meningkatkan nilai ekonomi sagu dengan mengolahnya menjadi beragam makanan, bahkan pasarnya sudah meluas ke Malaysia dan Singapura.

"Kami berharap ketika kami bisa mencari pasar untuk masyarakat di kampung Manggroholo dan Sira, program sagu ini bisa secara kontinyu diproduksi oleh masyarakat," kata Juru kampanye Hutan Greenpeace Indonesia Charles Tawaru, yang selama ini mendampingi warga Manggroholo-Sira.
Olahan sagu yang akan diproses menjadi mi. 

Salah satu produk dari sagu yang sedang dicoba adalah mi sagu.

Tepung sagu yang dibawa dari hutan, diolah sampai kemudian menjadi mi. Prosesnya sebenarnya tidak begitu rumit. Tetapi alat yang dimiliki warga di Kampung Sira masih untuk skala kecil.

Produk-produk dari sagu yang dibuat masyarakat Kampung Manggroholo dan Sira baru saja dicoba dipasarkan di koperasi kampung "Koperasi Kenamandiri", di Kota Teminambuan, Kota Sorong, dan beberapa sampel di bawa ke Jakarta.
Copas :
- http://bobo.grid.id/
- (ANTARA News/Monalisa)

Kamis, 05 Juli 2018

Yikes! My garden grew too big! What to do?


by Nan Porter
Yard with flowers and rocks
I started my garden many years ago when there was a 20 to 30 minute rain practically every afternoon.  I would expand every summer with more wildflowers and perennials.  The garden grew and grew and grew.  Then the rains stopped and I had to water by hand since we are in the country on a well. The ground around my flowers is rock hard since I only watered the plants individually.  That took about 2-3 hours every other day. I weeded, and weeded and weeded. Oh, and I got a horse that I wanted to ride.  Hmm, should I pull weeds or go ride my horse?

I had to figure out what to do.  I didn’t want to kill my sparse flowers that were significantly getting even sparser the drier the climate got.  I had used river rocks for borders.  I love rocks, collected them on walks, vacations, even got a ton for a Mother’s Day present a few years ago! 

River rock and flagstone
The answer to my dilemma: ROCKS!   I decided to fill in the borders with more river rocks. Then I decided to add rocks where there were bare or weed infested spots.  At first I only wanted river rocks, but they didn’t cover much ground.  My husband decided to jack hammer up some big rocks buried in the ground in a small pasture.  I used all the jagged pieces from the project.  I continued to look for river rocks to put in the flower garden.

Then my husband decided to make flagstone steps and there were pieces left over.  The leftover flagstone covered way more ground than the river rocks. Flagstone joined the river rocks in the flower garden.

I found a partial flat of flagstone on sale and filled more spots!   However, I still needed more.  I bought a full pallet to cover more area.  Wow, flagstone is expensive! I ran out of garden money so I will have to wait another year for more flagstone.

Overview of garden with rocks
My problem of weeding and watering is slowly getting solved with rocks! From the pictures you can see the different sizes and types of rocks I have used.  I think the different sizes and types compliment the rugged look of the garden. I still plan to add a pallet a year to the garden for a few more years.  My garden is becoming manageable!  I have time to ride and less weeding!  I still need to water.  I think my next project will be to learn how to put in a drip system!

I now have a garden of flowers and rocks!!!  (I might add some bushes next!)

Nan Porter (Master Gardener class of 2017) gardens on a well at 7100 ft.  She is a gardener, barrel racer, and photographer (Nan Porter Photography).

Minggu, 01 Juli 2018

PANDUAN MUDAH MELIHAT KADAR KEASAMAN TANAH

https://tipspetani.blogspot.com/2018/07/panduan-mudah-melihat-kadar-keasaman.html

Tanah merupakan faktor penting dalam budidaya pertanian. Selain sebagai media tanam, tanah juga berfungsi untuk menyediakan unsur-unsur hara pendukung pertumbuhan tanaman. Karena itu untuk mendukung keberhasilan usahatani penting kita ketahui kondisi tanah, apakah terlalu asam, netral atau basa. Kondisi tanah yang ideal untuk budidaya adalah pada pH netral (6-7).

pH memiliki ukuran dari 0-14, tanah dengan pH 0-7 masuk dalam kategori asam sedangkan tanah dengan pH 7-14 masuk dalam kategori basa. Tanah netral memiliki pH 7. Tanah dengan pH yang rendah ataupun tinggi akan mempersulit tanaman dalam menyerap unsur hara. Yang artinya tanaman mampu menyerap unsur hara secara optimal pada pH netral.
Banyak sekali yang menyebabkan pH tanah menjadi rendah, yaitu :

  • Curah hujan yang tinggi mengakibatkan tercucinya unsur hara pada tanah, kemudian berimplikasi pada terbentuknya tanah asam,
  • Adanya unsur Al (alumunium), Cu (tembaga), dan Fe (besi) yang berlebihan,
  • Lahan yang tergenang air secara terus menerus karena tata drainase air yang tidak baik,
  • Dekomposisi bahan organik dari dalam tanah,
  • Penggunaan pupuk kimia yang berklebihan,
  • Secara umum pengertian dari tanah asam / ber pH rendah adalah tanah yang kekurangan kalsium dan magnesium.

Banyak cara untuk mengetahui tanah tersebut asam atau basa, baik secara tradisional maupun menggunakan alat ukur :

Secara Tradisional
1. Cara sederhana mengetahui pH tanah di lahan pertanian asam atau tidak, cukup dengan melihat apakah di lahan tersebut terdapat tumbuhan Melastoma malabathricum. Jika tanaman tersebut tumbuh, maka mengindikasikan lahan tersebut memiliki pH asam atau dibawah 7

https://tipspetani.blogspot.com/2018/07/panduan-mudah-melihat-kadar-keasaman.html
Melastoma malabathricum

2. Menggunakan kunyit seukuran jempol tangan
Potong menjadi dua bagian. Langkah berikutnya adalah mengambil sampel tanah dari empat ujung titik lahan di tambah pada bagian tengah, kemudan di aduk dalam sebuah wadah dan dibasahi dengan air. Masukkan satu bagian kunyit yang sudah dipotong ke dalam tanah ± 30 menit. Lalu angkat, kemudian perhatikan dan bandingkan warna potongan kunyit yang telah dimasukkan ke dalam adonan tanah dengan potongan yang tidak di masukkan. Jika warna kunyit menjadi pudar makan dapat dipastikan lahan tersebut memiliki kadar keasaaman tinggi atau pH di bawah 7. Jika warna kunyit tetap, pH tanahnya netral. Sedangkan, jika warna kunyit menjadi biru, maka tanah bersifat basa dengan pH di atas 7.
https://tipspetani.blogspot.com/2018/07/panduan-mudah-melihat-kadar-keasaman.html
kunyit

Menggunakan Alat Ukur
Cara pengukuran pH secara tradisional memang tidak akurat secara tepat, sebah hanya mengetahui tanah asam, netral atau malah basa. Sehingga akan sulit memberikan perlakuan pada tanah, oleh karena itu perlu dilakukan cara pengkuran yang terukur dengan menggunakan alat. Alat yang dapat dipergunakan adalah :

1. Menggunakan kertas lakmus atau pH indicator. Langkahnya dengan mengambil sampel tanah dari keempat titik ujung lahan ditambah satu titik di tengah, kemudian dicampur rata. Selanjutnya campur dan aduk secara merata menggunakan air, dengan perbandingan 1:1.
Biarkan selama 15 menit sehingga air dan tanahnya terpisah (mengendap) dalam wadah. Lalu masukkan ujung kertas lakmus atau pH indicator tadi selama 1 menit. Usahakan jangan mengenai tanah. Setelah warna kertas lakmus stabil segera angkat. Lalu cocokkan warna yang ada pada kertas lakmus dengan bagan warna.

https://tipspetani.blogspot.com/2018/07/panduan-mudah-melihat-kadar-keasaman.html
lakmus

2. Menggunakan pH meter dengan memasukkan ujung alat pH meter pada keempat ujung titik ditambah satu titik dari tengah lahan. Hasil yang diperoleh langsung dalam bentuk angka yang sudah dirata-ratakan. Skala keasaman tanah dapat dilihat secara langsung, sehingga mempermudah pemberian dosis dolomite atau kapur pada lahan jika lahan tersebut memiliki pH yang rendah (asam).

https://tipspetani.blogspot.com/2018/07/panduan-mudah-melihat-kadar-keasaman.html
pH meter

Secara umum, setiap kekurangan 1 tingkat dari pH 7(netral) membutuhkan 2 Ton dolomite setiap hektar. Contoh hasil pengukuran pH tanah 5 maka untuk menaikkan menjadi 7 jika ukuran tanahnya 1Ha maka membutuhkan 4 Ton Dolomite. Pemberian dolomite dilakukan sebelum tanaman ditanam atau benih ditabur.

Daftar pustaka

Wawan K. 2015. Tabloid Sinar Tani Edisi 18-24 Maret 2015

Kamis, 28 Juni 2018

Container Gardening

Containers come in a variety of sizes and shapes
by Barbara Sanders
Small spaces in the yard, on a patio, or on a deck are great growing places for container gardens.  If you are just starting, keep it simple.

Decide what to plant- Lettuce seeds can be started now.  For all seeds, read the directions on the packet. Other choices include: spicy greens such as mustard and Arugula (rocket), radishes, green onions (scallion), cilantro (coriander), dill, and spinach. Or purchase potted herbs from a nursery.  A few fun ones are: chives, oregano, parsley, basil, thyme, borage. If conditions are a bit drier, or in a separate pot: rosemary and sage (you may need to bring them in for the winter, as they are not hardy in most mountain areas). Adding annuals is fun too: salvia, zinnia, marigolds, nasturtiums.

Find a good location- Easy to walk to, water nearby, and light. Light is most important. Many seed packets and garden books suggest “full sun”. Well, our Colorado sun will burn most greens! My suggestion is “dappled” sun. Aspen trees offer light shade. Six hours of light per day is optimum.
Even a water trough can be used as a planter

Choose a container- Recycling places have a variety of containers and many creatively adaptable choices. Look for one with a hole in the bottom to allow the water to drain. You can drill a hole if needed. Because of our dry conditions here, non-porous containers are preferred or the plants will dry out too fast. Remember, the bigger the container, the heavier it will be when filled with dirt.

Fill the container with soil- Best to use the “soil-less” mixtures as they are lightweight and “plant ready”. Garden dirt and/or “topsoil” are heavy with clay particles which don’t allow the plant roots to breathe, and may contain weed seeds and disease organisms. Do not put pebbles in the bottom of the pot, as this does not improved drainage, and can cause a perched water table. Very little soil will come out of the hole. Fill the pot up to 1 inch below the rim. With a large container, you may want to start with Styrofoam packaging peanuts as they are inert and lightweight. A piece of landscaping cloth can be used on top before adding soil.

Now your container is ready for seeds or plants- With seeds, follow packet directions.  With nursery grown plants, check the roots before potting. If they seem winding around the root ball, gently untangle them to allow them to spread out.  Place the plants as deep as they were grown at the nursery. Press into the new soil firmly. Spacing and design is a matter of choice. Lettuce seeds can be started amongst the herbs, eventually filling in any spaces.

Water until the water drains from the bottom of the pot, then wait until the first inch of soil becomes a bit dry before watering again. Then water until water drains from bottom. If the soil pulls away from the edges of the pot, it has been allowed to get too dry. You will be watering frequently, welcome to Colorado!  Some folks use polymer crystals which expand with water. In theory, they should provide water for the plants, but in reality, they don't supply enough moisture.

Maintaining this oasis is pretty straight forward- pinching growing tips allows the plant to fill out, removing dead flowers and leaves makes the container attractive. Fertilizing is a must. A water-based fertilized added to your watering can is best. Follow instructions on the product label. You may also have some visiting insects: aphids, earwigs, slugs, caterpillars, etc. There are websites to help identify the good and bad.  Look for advice for food crops. Aphids are a pain. Water spray removal may uproot your garden. A soap-based product will work but follow the directions carefully. Earwigs can be trapped in rolled newspaper. Slugs can be sprinkled with table salt but be careful of adding too much salt to your soil. For caterpillars, the abrasive nature of Diatomaceous Earth cuts holes in their exoskeleton and dehydrates them.

Sources:
www.ext.colostate.edu          Fact Sheet No. 7.238 CMG GardenNotes#731
www.migarden.msu.edu        Successful Container Gardens

The Vegetable Gardener’s Container Bible by E. Smith
The Salad Garden by Joy Larkham  (English Author)
The American Horticultural Society Encyclopedia of Gardening by C. Brickell. Ed.

Barbara Sanders and her husband moved to Steamboat from Hawaii in 1997.  She learned about Colorado plants and trees through the Master Gardener program and while volunteering at the Yampa River Botanic Park.  Barbara finds native plants most interesting as “they are adapted to our crazy, changeable climate and to our different soils” and her vegetable garden the most fun, which she tends with her husband, Bill.

Kamis, 21 Juni 2018

Mountain Snowberry


by Vicki Barney
A number of native shrubs have bloomed spectacularly this spring:  fragrant chokecherries with trailing blossoms, serviceberries with bursts of blooms, mountain ash with flat-topped flower clusters.  But it is the little Mountain Snowberry that catches my eye this time of the year.

Snowberry in bloom
Mountain Snowberry (Symphoricarpos rotundifolius (oreophilus)) is one of a variety of snowberries native to our area.  A small deciduous shrub in the honeysuckle family, it grows 1 to 5 feet tall and is currently blooming under the shrubs and aspens along our trails, as well as out in the undisturbed meadows.  The flowers are not showy and consist of clusters of small light pink bells at the ends of branches.   In the fall, it produces clusters of showy white berries that when broken open, reveals fruit that looks like “fine, sparkling granular snow.” (https://en.wikipedia.org/wiki/Symphoricarpos)

Mountain Snowberry is a wonderful addition to the wildlife garden.  The shrub is attractive with an arching growth habit and small rounded leaves.  It attracts pollinators – bees, butterflies, moths, and hummingbirds – and is both a host and a food plant.  It also provides food and shelter to birds and small mammals, as well as early spring forage for deer and elk.  Rated for USDA plant hardiness zones 2-7, it thrives in all types of soils, and once established, is fairly drought tolerant. 

Mountain Snowberry, however, might not be right for your garden.  One garden website warns that it may not be the best behaved shrub because it spreads via rhizomes and may be thicket-forming without regular pruning.  It also is prone to disease if growth is too dense and, while the berries are beneficial to wildlife, they are toxic to humans.  Ingesting more than a couple of berries may cause vomiting, diarrhea, dizziness and sedation.   Last, like many natives, it may be hard to find at a nursery.

Mountain Snowberry
Colorado State University Extension has a great publication that is helpful to gardeners interested in planting native shrubs called “Native Shrubs for Colorado Landscapes.” (http://extension.colostate.edu/docs/pubs/garden/07422.pdf)  It includes tips for planting and advice for all steps of the process, including purchasing the shrubs from commercial nurseries.  It explains why one should not collect them from the wild – the practice reduces biodiversity and encourages weeds – and touches on issues around finding native plants for purchase.  In fact, I’ve have found it difficult to purchase some native plants locally. Deciding Mountain Snowberry would be an appropriate addition to my wildlife garden, I purchased and planted “snowberry” shrubs a couple of years back.  Unfortunately, I did not order them by their Latin name (Symphoricarpos rotundifolius/oreophilus), so I am not sure what I received. Per Karen Vail’s Garden notes in Edible & Medicinal Plants of the Southern Rockies, ”There is a dizzying variety of snowberries available in nurseries, unfortunately most of them misnamed.”  

Are my shrubs the native Mountain Snowberry?  If not, are they wildlife friendly? Are they thriving? Are they pretty?  They don’t look quite like the native shrubs in my neighborhood: arching growth habit, small oval leaves, and spring flowers.  My shrubs are more robust and have larger odd shaped leaves, but they are thriving and attractive.  They are also wildlife friendly as they have leafed out early and are sheltering birds.  They have not yet bloomed, though, so may not provide food for wildlife.  Perhaps they will bloom later this season as they are in a shadier spot. I will wait and see and, in the meantime, will enjoy the pretty green shrubs that are drought tolerant and maintenance free.
Vicky Barney gardens for wildlife and is a member of the Master Gardener Class of 2011

Kamis, 14 Juni 2018

Watering the Vegetable Garden

by Virginia Baer
Those of us living in Colorado should be fully aware of Colorado Water Law as it applies to domestic water rights and crop irrigation. Those gardeners who are fortunate enough to live in a municipality that supplies their water do not feel the restriction of water use nearly as strongly as those who receive their water by way of a residential well. Further, those with residential wells that were in place before 1972 do not feel the restrictions in place as those who have wells drilled after 1972 where outside irrigation is prohibited. (But do note that even those with household-use only wells are allowed to collect up to 110 gallons of rainwater from a residential roof). Water restrictions or not, as gardeners we should all be aware of the importance of being conservative with our water use. This is especially important in 2018 where over half of our state is experiencing drought anywhere from moderate to extreme.

If you have healthy, well amended soil you have a good chance for having soil that will hold sufficient water for your plants to thrive. Organic matter in the soil should be at 4%-5% of the makeup of the soil. Sandy soil needs amendments to give the soil more structure so that the water does not run through it too quickly. Clayey soil needs amendments to give the soil pores so that it can breathe and the roots have room to expand. Also, amendments in clayey soil help to keep the soil from being overly compacted.  Vegetable plants utilize about ¼ inch of water per day. This may vary depending on temperature,wind and soil condition. Therefore, water a garden 1 inch would require watering every 4th day.
Checking Soil Moisture
Checking your soil moisture is important so that the gardener can determine whether or not the garden has sufficient moisture. The gardener should irrigate the garden once the soil feels dry to the touch at a depth of 2-4 inches. I have found that using a houseplant watering meter to be very helpful in evaluating the soil moisture content.


Image result for checking garden soil moisture
Manually checking soil moisture with finger

Other Methods for Conserving Water
o  Plant in blocks, rather than rows. This creates shade for roots and reduces evaporation.

o  Control weeds that compete with vegetables for water.

o  Protect plants and soil from wind with windbreaks to reduce evaporation.

o  I have had the best success with using floating row covers.  These provide moderate shade and help to reduce evaporation, while still allowing adequate sunlight and rain water to get through.

Critical Water Periods for Vegetables
Be aware of the most critical times to water your garden. Water is most critical during seed germination, the first few weeks of development, immediately after transplanting, and during flowering and fruit production.  There are many methods that we can employ to be efficient in the use of water in our vegetable gardens while at the same time realizing that an adequate supply of water during the growing season is directly related to the quality and yields of our produce. There are several methods that can be used to conserve water and still have a productive vegetable garden.
Hand watering
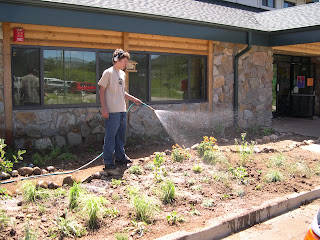
The simplest and often most efficient method of watering is just to hand-water with a hose. This allows the gardener to see exactly the amount of water that is needed, and to direct it to specific plants.
Drip system
Drip System Watering
Utilizing a drip system can reduce the need for watering up to 50% over sprinkler irrigation. It is especially efficient for block styled gardens and raised beds. Soaker hoses, in-line tubing with emitters and bubblers or drippers are all methods that can be utilized in a drip system.  Soakers can be buried a little under the soil or mulch. Burying the hose can also protect it from early breakdown by the sunlight.  One challenge of a drip system is the need for clean water. If the water source is not clean the hoses can become clogged.
Sprinkler Irrigation
With sprinkler irrigation, the amount of water being delivered can be easily measured. Sprinkler irrigation should discouraged on vegetables prone to foliar diseases such as Early Blight (tomatoes, peppers, and potatoes).  Sprinkler irrigation also soaks the entire ground thus promoting weed growth, and it also evaporates more in the air, and thus is less efficient.
Furrow Irrigation
For gardeners who have irrigation water from a ditch, furrow irrigation in the traditional row-style garden layout may be the easiest way to water your vegetables, but not necessarily the most water-efficient. Soil erosion, potential weed deposition and runoff are major disadvantages of furrow irrigation.

For more in depth reading about watering the vegetable garden and irrigation of the garden please refer to the following CMG GardenNotes, which can be found at http://www.cmg.colostate.edu/GardenNotesUpdate.shtml#cmg.   

#714  Irrigating the Vegetable Garden http://cmg.colostate.edu/Gardennotes/714.pdf

Jumat, 08 Juni 2018


by Estella Heitman
Oxeye Daisy (Chrysanthemum leucanthemum)
     Every gardening enthusiast has a "pet peeve" or two.  For this gardener, it is the Oxeye Daisy.  This daisy is native to Europe and was introduced to America intentionally as an ornamental and accidentally as a contaminant of imported hay and grain seeds.  It has spread to virtually every state, and in Colorado it is now included on the B List of Noxious Weeds.   Noxious weeds are not just plants out of place; they are non-native plants that are displacing native vegetation and disrupting ecosystems.  List B plants are those for which The Colorado Commissioner of Agriculture, the Colorado Noxious Weed Advisory Committee & local governments are developing and implementing plans to stop the spread of the species.  The greatest impact of the oxeye daisy is on forage production of infested pastures and meadows.  Cattle avoid grazing oxeye daisy.  Dense stands of oxeye daisy decrease plant diversity. 

     These facts are often unknown and/or disregarded by non-professional gardeners - and frequently by property owners who have little interest in gardening but enjoy the vista of acreage covered with these attractive bloomers.  Because the oxeye daisy is such a pretty plant, proper management is often neglected and the plants increase at an alarming rate and compete perniciously with more desirable plant life.  This gardener has, in fact, heard friends and neighbors express great pride in these plants which spread and cover otherwise untended land, requiring little moisture and virtually no care. The oxeye daisy is  often confused with  the Shasta daisy (Leucanthemum x  superbum), a plant that is also a non-native ornamental, although it has a clumping rather than spreading root system and is not considered an invasive plant. 
     The oxeye daisy is a perennial which reproduces primarily by seed, although underground rhizomes contribute to the plant propagation.  Each flower may produce 100 to 250 seeds.  A singly plant may produce up to 26,000 seeds seasonally.  Educational awareness regarding the oxeye daisy and proper management strategies are important for our environment, for our grazing lands, and for the natural beauty of our mountain neighborhoods. For areas with established oxeye daisy invasion recommended controls include mowing as soon as buds appear and continued mowing through the growing season  Hand pulling may be practical for controlling small populations of oxeye daisy, since root systems are shallow and the plant can be dug up and removed.  Herbicides are another option.  Persistent preventative measures may have to be continued for many years since the seeds remain viable in the soil for long periods of time.

Estella Heitman is a Master Gardener who has made her retirement home here in Routt County for the past nine years after many years of part-time residence.  Migrating from the mid-west, she had many, many lessons to learn as a transplanted high-country gardener.  She enjoys the challenges and joys of gardening in the mountains at 8000 feet elevation at her home near Stagecoach Reservoir.

Jumat, 01 Juni 2018

A native in the garden: Oregon grape


by Vicky Barney
   This spring, everywhere I look - on the trail and in my yard - I see pretty clusters of small bright yellow flowers above holly-shaped spiny leaves, leaves that are mostly rich green and may have spots of orange and red.  These small woody shrubs are Oregon grape, named for their edible but tart grape-like berries that appear later in the summer.

     The tall form of Oregon grape (Mahonia aquifolium or Berberis aquifolium) is the state flower of Oregon and grows 3 – 6 feet tall.  The plant I am seeing is much smaller (1 – 2 feet tall) and is Creeping Oregon grape (Mahonia repens or Berberis repens).
     This broadleaf evergreen plant has many names – Oregon grape, Oregon grapeholly, Holly-grape, Mountain holly – which is confusing because it is neither a grape nor a holly. Creeping Oregon grape may also be called creeping mahonia, creeping barberry, or prostrate barberry.  Even the Latin names are confusing.   The plant is sometimes listed with the genus Mahonia and sometimes with the genus Berberis.  Further, botanists are not in agreement whether the creeping form is a subspecies of the taller form, or a species of its own, resulting in yet more Latin names for the smaller form (Mahonia aquifolium var. repens or Berberis aquifolium var. repens).
     Once you know the various names, you can find a wealth of information about Oregon grape.  Both forms are native to the western United States, and the creeping form is native to our area.  It may be found in complete shade, partial shade, and even in open areas.  This time of year, you can see the bright yellow flowers along popular hiking trails in this area as well as on the Front Range. 
     The Creeping Oregon grape in my yard is growing unattended under and around the edges of conifers, chokecherries and serviceberries, sheltered from winter sun and drying winds.  It is growing in a sprawling fashion in some areas and is tall and leggy in other places.  Some flowers perch on stems over 2 feet tall.  It is a wonderful plant for those of us who garden for wildlife: the early blooming flowers provide nectar and pollen for bees and butterflies, and summer berries provide food for the birds.
     Creeping Oregon grape is a great plant to actively cultivate in our gardens as well.  It tolerates sun, likes the shade, requires very little water once it is established, and is rarely browsed by deer.   Pruning will result in shorter, denser plants that make for great ground cover in shady areas.  It also can stabilize hillsides with its underground growth habit, and is resistant to wildfire.   Medicinal and edible uses are detailed in “Edible & Medicinal Plants of the Southern Rockies” by Mary O’Brien and Karen Vail.
     With its striking yellow flowers set against shiny leaves in reds and greens in spring, followed by pretty blue berries in summer, and ending with leaves in all shades of red in the fall, Oregon grape adds interest and value to our yards all season long.
Vicky Barney gardens for wildlife and is a member of the Master Gardener Class of 2011.

Beranda pertanian masa kini