Jumat, 29 Maret 2019

Vegetable Garden Layout


by Ginger Baer
For many years vegetable gardens were spacious, spread out and required a lot of weeding, water and upkeep.  I loved my BIG garden, but hated the weeding and tried many methods to cut down on that kind of work. It wasn’t until I moved to the mountains and joined our community garden that I actually tried intensive gardening (due to the fact that my space was limited). Each garden plot measured 4' X 12', a far cry from my 20' x 20' garden at a lower elevation.
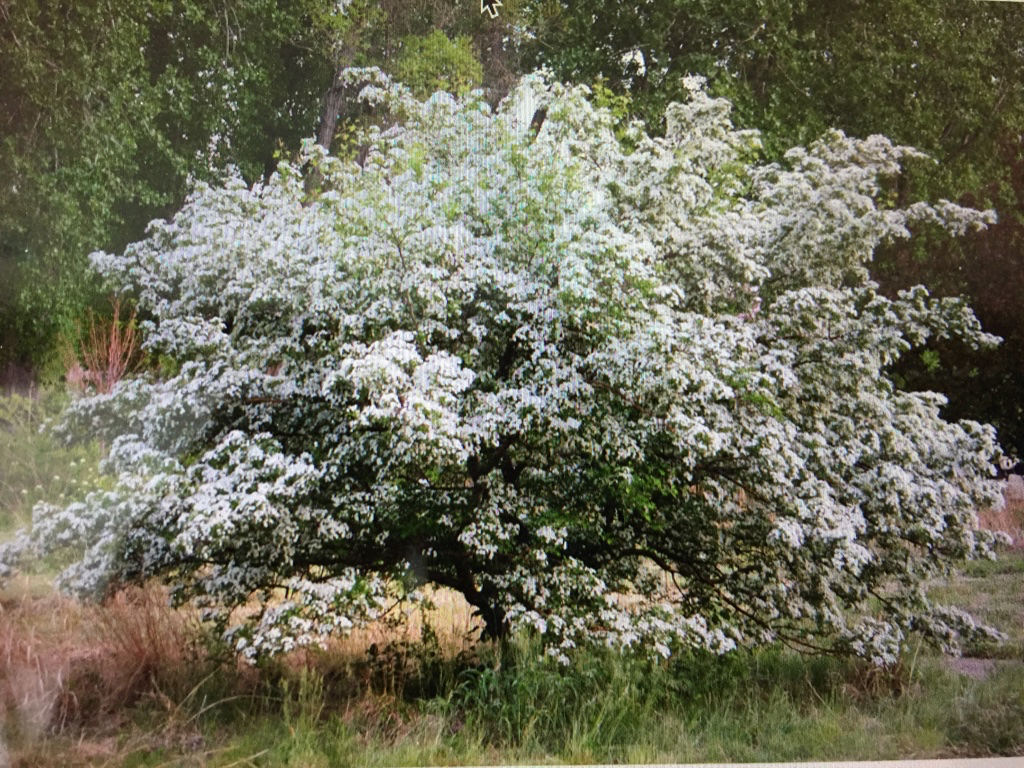
In-ground garden
The most important part of selecting your garden location is location.  You need to have plenty of sunlight, well-drained soils and availability to water.  Leafy vegetables, such as lettuce and spinach, require the least direct sunlight, only 4 to 5 hours. Root vegetables require 5 to 6 hours, and fruiting vegetables (such as tomatoes, cucumbers, and zucchini) require at least 8 hours. In Colorado, water can be a challenge unless you have water rights.  This is why I have a plot in the Gilpin County Community Garden.  They provide the water.

Broad forks
If one has plenty of space, water, time and energy, row gardening can be a great way to garden. It does require a bit of money to amend the soil, maintain and water. I had successfully gardened this way for many years. You will need to be sure that your rows are straight (you can use a string for your layout) because this will make tilling between the rows easiest. In this style of garden, you will need to take care that you don’t walk on the rows as to avoid compaction of the soil, which will inhibit root growth. 

Until recently, mechanical tillers were the recommended method for turning the soil.  Recently, however, it is recommended that you hand till the beds with either a garden fork or a broad fork.  This can be labor and time intensive if your garden is large, however, you are minimizing the chances for compaction (by footsteps and heavy equipment). If this is your style of garden, then by all means, go for it.  

For me, however, I have really loved my smaller, intensive garden. Square foot gardening is a trend that started out in the 1970’s and 1980’s and was developed by Mel Bartholomew. [1] This method has been further developed and there is a garden note from CSU Extension on what is called Block Style Garden. [2] I have adopted this style of gardening in my community garden plot. The idea of this style of gardening is to maximize yields for the space allotted. In your space you should lay out a plan to plant crops with an equal-distance space between neighboring plants in both directions. In doing so you will also need to consider the sunlight requirements of each of your plants.


Another consideration is how much room each plant requires for growing.  Lettuce, radishes and carrots are ideal for block gardening, whereas squash and vining vegetables such as cucumbers may require too much space.  One thing that can help with those types of plants is a trellis. Remember the direction of the sunlight when using this method so that you do not shade the other plants in your garden.

Due to the fact that there is such intensity in your plantings you will need to be sure that you maintain the richness of your soil. Concentrate on improving soils with routine applications of organic matter and get soil testing along the way to be sure that you have a correct balance.

Block style gardens are well suited for both in-the-ground plots or raised beds. As mentioned above, I started mine in a plot that measured 4 ft x 12 ft and it was in the ground. In this plot, I was able to grow onion, lettuce, spinach, arugula, carrots, peas, radishes, turnips, beans, squash and a cherry tomato.

Raised beds in Community Garden
The community garden also offers raised beds by way of galvanized water troughs measuring 3 ft x 10 ft.  I love mine! Last year I grew onions, carrots, radishes, lettuce, arugula, peas, beans, squash and cucumber.  One error I did make was to grow too many squash plants, and you know how those squash multiply (keep your car windows closed!).  The squash really spread and overtook the cucumber plants and beans.  One plant will be enough in the bed this year.

Whatever method you decide to use, it is always a good idea to layout your garden plan with pencil and paper.  This way you will be sure of how much room you have for your plants and you will also have a good record from one year to the next of what you grew, what did well, and what did not. Make the most of your space and happy gardening!


Jumat, 22 Maret 2019

Brassicas

Brassicas in garden (photo Yvette Henson)

by Yvette Henson
I just planted my brassica seeds in flats to plant out into the garden when it is time.  Brassicas are plants in the Brassicaceae family, also known as cruciferous or cole crops.  Plants in this family that are grown for eating include cabbage, kale, broccoli, cauliflower, mustard, radishes, turnips, and more.  As vegetables, they are rich in anti-cancer compounds, one of which is free glutamine.  Brassicas are also high in other many other nutrients.

Brassicas are cool-season crops.  Although some varieties can take longer to mature, they can better survive temperatures below freezing.  We can plant them before the last spring frost and/or later in the summer so they mature when temperatures are cooler (which will improve their flavor and quality).  Cool-season crops generally do very well in our mountain communities where we have lower day and nighttime temperatures.  They can grow well in the open but growing under cover gives the advantage of an extended harvest (earlier and later), cooling in the summer, less evaporation from the soil and protection from cabbage worms, etc.

Brassicas in garden (photo credit Yvette Henson)
Brassicas aren’t too picky about soil - some of them even prefer clay soil.  They do require fertilization (pre-planting and every 3 weeks through harvest), and need water most when establishing and when edible parts are maturing.  Uneven watering and high temperatures may cause heading-type brassicas to split or bolt.  Many disease problems can be reduced if grown on 4-5 year rotation with non-cole crops. The most common insect pests are cabbage worms, aphids, and flea beetles.  These pests are best managed by reducing stress on the plants, covering them with row cover or timing the planting to avoid a particular pest. 

All the varieties I will recommend in this article are open pollinated (OP).  That means that you can plant extra for seed production.  If you provide proper growing conditions, isolation distances and save the best for seed, replant and repeat, you should eventually get a better strain adapted to your local conditions.

Radishes  (photo Baker Creek Seeds)
Radishes (Raphanus sativus) are a good digestive.  Radish roots can be eaten fresh, be pickled or roasted.  There are also radishes cultivated for their edible leaves and seed pods (Raphanus sativus subsp. caudatus).  Radishes are probably the easiest Brassica to grow.  Be sure you know if you have spring radishes or fall radishes so that you plant them in the correct season.  Most spring radishes mature in a short time (30 days +) but generally fall radishes take longer to mature.  If your season is really short you can plant both types in the late winter and spring, but if you have warmer summer days you will want to plant fall radishes later.  Fall radishes often store well. My favorite spring radish so far is ‘Early Yellow Turnip-rooted’.  Yellow radishes withstand heat better than reds.  My favorite fall radish is ‘Watermelon Radish’ (60 days).

Kales (2 different Brassica spp.) have a high mineral content and are good cleansers.  They also contain vitamins A & K and potassium.  They are easy to grow and can yield a lot of greens over time in a small area.  Kale can be direct seeded in the garden 3-5 weeks before the last frost date, or 6-8 weeks before first frost.  You can start harvesting young leaves as early as 40 days and it can be harvested several weeks after the last frost.  ‘Red Russian’ is a Siberian kale (Brassica napus), the classic kale with tender leaves that makes great massaged-kale salad; dinosaur kale (Brassica oleacea) is great in soup and for kale chips; and a beautiful burgundy-leaved curly kale (Brassica oleacea) is ‘Baltic Red’ which is edible and ornamental! 

Early Jersey Wakefield Cabbage (photo Southern Exposure Seed)

Cabbage (Brassica oleracea var. capitata) contains chlorine and sulphur which help cleanse stomach and intestines, and cabbage juice is good for stomach ulcers.  They are relatively easy to grow but they don’t compete well with weeds or deep cultivation. They do best when planted as young plants directly in the garden.  If planting is timed so that heads are forming when temperatures are cool they will be denser and of better quality.  They are most susceptible to frost damage when heading up, but there are cabbage varieties classified as winter cabbages that can withstand frost.  These types can often be stored for several months in the winter.  Two of my favorite varieties of cabbage are ‘Early Jersey Wakefield’ and ‘Mammoth Red Rock’.  ‘EJW’ is an early (60-75 days) cabbage with a conical head and mild, sweet flavor, and it doesn’t take up too much room in the garden.   'MRR’ matures a little later (100 days), it has a round flat head with purple tinged leaves and stores well. It makes an excellent semi-fermented ‘kraut’.  Purple cabbages seem to experience less aphid pressure.
Mammoth Red Rock Cabbage (photo credit Yvette Henson)
Nutribud Broccoli (photo Adaptive Seeds)
Broccoli (Brassica oleracea var. italica) can be a little more difficult to grow than cabbages.  They do best when planted out as young plants about the time of last frost (earlier if under cover).  Our favorite broccoli is ‘Nutribud’ (80 days).  It contains higher than average amounts of free glutamine.  It forms a beautiful head followed by side shoots.  We prefer the side shoots rather than the heads - they are more tender and continue producing until winter kill. 

Cauliflower can be difficult to grow.  It is sensitive to handling, temperature extremes and sun scald on heads.  A reliable variety that is easier-to-grow is ‘Macerata’ (70-80 days), it forms tasty lime-green heads.
'Macerata' Cauliflower (photo Baker Creek Seeds)
Please share your successes and lessons learned growing Brassicas.  What are your favorite varieties?

Yvette Henson is the Director and Agent at the Colorado State University Extension in San Miguel and West Montrose Counties.

Jumat, 08 Maret 2019

Those Darned Aphids!


by Kristina Hughes, Clear Creek County Master Gardener
Lime tree- Photo by Kristina Hughes
For those of us who like to let our houseplants spend time in the great outdoors during the warm months, there are many benefits. My plants love being outside in a protected location and they reward me with vigorous growth and rich blooms. Those benefits come with a price, however, and I have paid a price.

My lime tree in particular seems to attract aphids, which isn’t a problem when the plant is outside. Aphids are a favorite food of many birds and predatory insects. Aphids are an important food source for beneficial insects such as lady beetles (especially their larvae) and green lacewing larvae (see photo below). Some people recommend allowing small numbers of aphids to be part of a garden ecosystem, to support healthy populations of the predatory beneficials that love to eat aphids.

My lime tree does fine when it’s outside in the summer. But a couple of years ago, right around this time of year, the aphid eggs hatched. Since I don’t have a house full of beneficial insects (as much as I love them when they are outside) the aphids quickly got out of control. Honeydew was spattered thickly on the floor of my conservatory and the plant was crawling with, infested with, aphids.

I worked my way through the control options for aphids, starting with the least aggressive method. I took the plant into the shower and sprayed it down, knocking the bugs off the plant. I’ve used this method with satisfactory results on plants outside in the garden, where there are natural enemies to help. Inside, however, it only worked for a short time. Then they were back. When I couldn’t stand them anymore, I took the plant back into the shower. And I went around and around. 
Green lacewing larvae- These are good guys (Bugwood.org) 

Next, I tried insecticidal soap. It worked for a little bit longer, but I still ended up with lots of accumulated honeydew and lots of creepy, crawly aphids on my plant. Again, if I had had beneficial insects working with me, the soap probably would’ve been sufficient. But as I indicated earlier, I love beneficials which are outside my house. I personally don’t want to release more insects intomy house.

I needed another approach. I clearly wasn’t reaching all of the nooks and crannies on my plant where the aphids were hiding. I consulted my references and decided to use a systemic insecticide. I followed the directions carefully and, most importantly, I kept the plant indoors out of reach of pollinators for several months while the insecticide was moving through the plant. Gradually the aphids started to disappear and eventually they were all gone. They have not returned. But I had to keep my lime tree inside all season and I would prefer to be able to put it outside.

Horticultural oil worked really well for the aphid problem I had on my honeysuckle (see my blog from January 17, 2018- http://coloradomountaingardener.blogspot.com/2018/01/aphids-on-my-honeysuckles.html). So this year I have a new plan. I will put the lime tree outside to enjoy the increased sunlight and fresh air. When I bring it in at the end of the season, I will apply horticultural oil to smother the aphid eggs. I am hopeful this approach will allow both me and my plant to be happier, but also keep the aphids out of the house!

For more information on how to control aphids indoors see:
Managing Houseplant Pests, Factsheet 5.595 from CSU Extension https://extension.colostate.edu/topic-areas/insects/managing-houseplant-pests-5-595/

Jumat, 01 Maret 2019

Why local snowpack is important


By Irene Shonle, Director CSU Extension in Gilpin County 

Overall, snowpack in Colorado is great so far this year (statewide, 114% of normal).   
Snotel Current Snow Water Table
As of February 25th, the South Platte River Basin (our watershed) is 110% of normal and the Arkansas is 125%. West slope river basins range from 107% to 122%.  This is great news to urban dwellers, to farmers and ranchers and to states downstream from us to whom we owe water, since that snowpack will soon be melting into water and rushing down the mountains in our streams and rivers.  This is especially welcome news after the dismal snowpacks of the last few years.

However, river basin snowpack means very little to us locally. The water many of us mountain dwellers drink comes from wells, and not from reservoirs or large underground aquifers as it does in the flatlands.  The production of those wells is entirely dependent on the precipitation that falls in our own yards. It’s very local. And, along the Front Range, from about 7,500’ to 9,000’, we have not gotten great snowfall amounts this year. We are not on the Snotel site, so it doesn’t really show up anywhere, but most of our snowfalls this winter have just been a few inches or so. As one long-time Gilpinite said, you know snowfall has been scarce when 8” seems like a big snow! I have heard reports of wells going dry already this winter. It’s been that way for the last couple of years, and I am hoping for some bigger snows this spring. We need it!

Aquifer diagram
Our wells gather water from melting snow and rain seeping into tiny cracks in the bedrock. The ground water held in these cracks is called a fractured rock aquifer and is only recharged by precipitation. Some of these cracks are as narrow as a human hair, and they are all connected to each other for water to be able to travel through them to your well. This ground water recharge system also explains the phenomenon of well water discoloration in the spring – when large quantities of water enter the fractured rock aquifer when the snow melts, sediments, nutrients and tannins can be carried along.  Shallower wells tend to see this more frequently -- even after a big rain -- whereas deeper wells see it only in the spring or not at all.

Local moisture also has a big impact on the moisture content of trees and fire danger, and yes, the performance of your perennial plants in your garden. The last few years, at least in Gilpin County, have not seen good summer rains either, so this year it would be good to have some spring snows followed by summer rains. There is a somewhat increased probability for above average precipitation this spring, so here’s to hoping!
Three-month precipitation outlook

Senin, 25 Februari 2019

Composting
In the Mountains

Tuesday, March 19 @ 6:30 pm
Gilpin County Exhibit Barn (230 Norton Dr.)

 Tips to help you compost - create usable compost, reduce material to landfill, and deal with wildlife.

Registration encouraged:
303-582-9106
extension@gilpincounty.org


Extension programs are available to all without discrimination.   If you have a disability for which you seek an accommodation, please notify Gilpin Extension before the event.   Contact us for information about financial assistance. Colorado State University Extension, U.S. Department of Agriculture and Colorado counties cooperating.        

Senin, 18 Februari 2019

“Where the Columbines Grow” … from Seed to Flower


By Jan Boone
For the hearty and more persistent gardeners among us, braving the challenges of germinating flowering perennial plant seed, then growing and transplanting seedlings is an interesting area to research and pursue.  Frequently though, it’s often a lengthy and frustrating process.  Put obstacles aside momentarily and let’s start with a simple flower we all know, the Columbine.
How many of you reading this posting recognize the title quote above as the first line of our state song?  Sitting here at my laptop, gazing out at 8” of snow on my back hillside, it’s hard to think flowering, colorful thoughts while the garden is buried underneath a white blanket.  But I can’t stop imagining this ‘purple dusted’ flower.  (Again, a descriptive phrase from our state song).  
This delicate flower has become a true favorite of mine. Up until late this last summer, I had a small bed of Columbine growing by my front deck and another by my small water feature in the back yard.  Because there is no fencing around my yard, these small beds were protected by 4’ high cages with laces on top to discourage curious noses trying to detect an instant snack!  Alas, as the drought took us well into early Fall, I came home one day to discover the cages around my front bed had been knocked over and the Columbine eaten to stubs.  My Columbine are planted in memory of special people I’ve lost.  It was a hard picture to see that afternoon, yet the snow covering the hillside this morning, pushes me to look forward in a renewed planning effort for these beds to emerge again next Spring.  
Initially I know I’ll need to rely on Garden Center help for blooming plants this year, but with luck, perhaps germinating some seeds will assist my efforts for next year.  Allow me to explain how I became so enamored by these flowers:  On the SE side of my house, under some pines I noticed two purple & white flowers growing happily, partially hidden off an uphill path frequented by deer and elk.  I have watched with wonder over the years how these true natives manage to survive, some years blooming happily and other years staying dormant for lack of water or simply veiled from far sighted critters!  These flowers have come to be welcomed landscape visitors who do their own thing while I take pleasure in just knowing they are there. These Rocky Mountain Aquilegia are just some of the native perennials for our higher elevations, self-seeding and using the cold and snow to their growing advantage. (Note: There are a variety of Columbine seeds available in Catalogs and Garden Centers, so be careful in choosing.  It can impact the successful germination for heirlooms, hybrids or seed you’ve collected.)
The Native Columbine are among the hardiest of our flowering plants. Colorado has the Blue and Golden varieties; however, I’d also like to note the Red Columbine Aquilegis canadensis. This is a charming small red/yellow variety that attracts hummingbirds and 4 types of bees.  This is native to our East Coast and Canada up to Zone 8, but I’ve also seen this plant growing in multiple diverse zones from South Dakota to California’s Bay Area; also, Southern California, Seattle and my former backyard in Metro Denver.  Aquilegia McKana group columbine are popular varieties with their large multi-colored flowers.  These colors will change for each new blooming cycle, sometimes merely by the pollinators who may have visited the plant or by the hybridization of two parent seeds.
Similar to many native flowering plants, cold stratification is a good method to encourage seed germination, especially for those seeds with hard, waxy seed coats where cold and water are needed.   There is a good reference document from Missouri Botanical Gardens about Native Seed Propagation Methods.  Also, Starting Plants Indoors from Seeds by the University of Missouri Extension office. This latter document provides good guidelines on temperature and germination timing.  Cold stratification basically gives seeds a jump-start in the germination process that native wildflowers get by just being subjected to outside elements (cold and water), especially during winter months.  Take stock of your patience when it comes to cold stratification and seed germination. Prepare to be tested!!  This is not a case of simply soaking seeds in water overnight to help soften seed coats.  Just like a dormant cold period for bulbs, many perennial seeds do need cold in the germination process.  Do your homework.  There are numerous methods to try but The University of Illinois Extension office offers this following simple cold stratification process:  1) Place seed in a plastic bag w/moist sand or sphagnum moss.  Close bag.  2) Place bag in a corner of your frig for 4 weeks.  *** Do not freeze bag as this slows down the germination.***
This two-step pre-conditioning process allows you to sow seeds indoors in much the same manner you may already do for vegetable seedlings or annual flowers.  Remember perennial seeds are notoriously slow to germinate, often 3-4 weeks or longer.  They also recommend that if you get no germination, place your container outside for sun and water during the summer.  Seeds could still germinate over several years   If you are lucky enough to have germination and eventual seedlings, treat them for the special gifts they are!  
Do not expect seedlings to produce flowers the first year, but with luck, you will eventually be rewarded with that purple dusted flower.  Or if you’ve germinated hybrid McCanna Columbine seeds, you may have a rainbow in your own garden bed.  In general, allow seeds to mature from dead flowers and let them self-sow to the soil.  If you don’t mulch too heavily and keep the beds moist, these flowers should return again and again.  There are additional flowering perennials that you can try to germinate from seed: Rudbeckia, Verbena, Dianthus, Helianthus, Prairie Cone Flower, Penstemon and Oriental Poppy.  Cross reference these with CSU Extension Fact Sheet #7.242 on Colorado Native Herbaceous Perennials for further insights on elevation, time, size & color.
To fulfill our continued quest for new and enduring color in our gardens during the coming growing season, we often need help by purchasing established plants (when it comes to immediate blossoms, many being perennial flowering plants).  Consider the potential cost effectiveness of germinating these seeds.  Life is full of challenges … so why not try germinating these seeds?  Finally, we mustn’t forget, many pollinators are depending upon us. 
Happy Spring garden planning!

Jumat, 08 Februari 2019

Experiment with an Ornamental Tree!


by Sharon Faircloth
Living in the mountains, we’re lucky that we don’t often need or want to add trees to our landscape because much of our terrain already enjoys them naturally.  When I moved into my home 40 years ago, owners had to get approval from the HOA to remove a tree.  Now we understand the importance of defensible space and spacing for optimal tree health.

When adding to our beautiful landscape, natives should always be your first consideration.  They are already adapted to our climate, soil and moisture.  They require little or no pruning or fertilizing.  With proper site selection, native trees should thrive.  There are a number of Fact Sheets available to help you choose, plant and establish a new tree.
Russian Hawthorn (Photo by Sharon Faircloth)
If you want to try something ornamental and different, consider the Russian Hawthorn.  The Crataegus ambigua is a member of the Rosaceae family, a non-native but very hardy to Zone 4.  It will do very well in a sunny location with well draining soil.  It does well as a single ornamental or in groups.  It will grow from 14 to 20 feet high and up to 12 to 16 feet wide.  Once established, it should not require additional watering. 

It will mature into a tough tree with a gnarly, brownish gray trunk, the typical haw’thorns’, and green, lobed saw-tooth leaves.  In late spring, it is covered with pretty white blossoms and later in the summer with bright red berries.  The berries persist through the fall as the leaves change to a reddish golden color.  Often the berries will last into the winter providing visual interest for most of the year. 

Russian Hawthorn berries
Many years ago, in one of my many professional landscaping adventures, the landscaper planted a Russian Hawthorn in my front yard.  No instructions were given to me on how to care for the tree so it never received any care!  I share this because, in spite of being ignored, it grew into a lovely little tree.  It certainly looks better in years of more moisture but has survived many very dry years as well.  It’s not as large as many but the birds and bees enjoy it and, for the most part, the elk and deer do not bother it. 
Russian Hawthorn in bloom
If you’re looking for an ornamental to add to your landscape, consider Crataegus ambigua for a low-maintenance, long-living, visually interesting option!


Articles about choosing, planting and care for native trees
Fact Sheet 7.421

Differences on Hawthorns, Plant Talk 1767
Pretty Tough Plants, Timber Press, by The Experts at Plant Select

Senin, 04 Februari 2019

TIPS BETERNAK DAN PERAWATAN GURITA


Hewan gurita ialah bukan hewan yang terdengar asing, hewan gurita dikenal sebagai hewan air yang hidup di lautan, memiliki ukuran tubuh besar, dan memiliki alat gerak berupa lengan yang juga digunakan untuk mencari pakan atau mangsa.

Secara alami, hewan gurita hidup di terumbu karang yang terletak di Samudera. Hewan gurita mempunyai 8 lengan yang dilengkapi alat penghisap berbentuk bulatan bulatan cekung di sekujur lengannya.

Hewan gurita tergolong sebagai hewan yang jarang dipelihara karena perawatannya sangat rumit. Tentu sangat jarang sekali ya sobat melihat hewan gurita berada di akuarium tempat pemeliharaan? Berbagai restorant yang mengolah hewan gurita menjadi masakan pun umumnya mendapatkan bahan dari tangkapan nelayan, tidak membudidayakannya.

Perlu diketahui nih sobat, hewan gurita dikenal sebagai hewan paling cerdas. Hewan gurita mampu menyelinap dengan cepat dan hidup di darat selama 1 sd 2 jam. Dengan kecerdasan dan kemampuannya untuk bertahan hidup di lingkungan darat selama 1 sd 2 jam tersebut, hewan gurita mampu melarikan diri dari akuarium tempat pemeliharaan yang menjadi tempat tinggalnya.

BACA JUGA
jika ia dipelihara sebagai hewan budidaya. Namun hewan gurita ternyata juga bisa dijadikan hewan peliharaan walaupun sulit untuk menjaganya agar tidak kabur. Hewan gurita merupakan hewan cerdas dan memiliki kemampuan memecahkan masalah sehingga sering dilaporkan melarikan diri dari akuarium tempat pemeliharaan yang tertutup rapat.

Beberapa hewan gurita dalam satu spesies yang sama mempunyai banyak variasi ukuran dan umur. Hewan gurita adalah binatang yang sangat kuat bila dibandingkan dengan ukuran tubuhnya. Hewan gurita yang dipelihara sebagai hewan peliharaan bisa membuka tutup akuarium tempat pemeliharaan dan bertahan hidup cukup lama di luar air sebelum masuk ke akuarium tempat pemeliharaan di dekatnya dan menyantap ikan ikan yang ada di dalamnya.

Nah tipspetani, kali ini penulis mengulas mengenai 11 Cara Budidaya Gurita di akuarium atau di tempat budidaya lainnya sebagai wawasan untuk sobat atau mungkin sobat sudah tak sabar ingin segera mencoba membudidayakannya?

1. Tempat Pemeliharaan
Sobat bisa menyiapkan akuarium tempat pemeliharaan khusus untuk memelihara hewan gurita. Jangan pernah memasukkan ikan ikan hias di dalam akuarium tersebut ya sobat, karena pasti akan dimangsa olehnya. 

2. Penutupan dengan Kawat Kasa
Tutup bagian atas akuarium tempat pemeliharaan tersebut dengan kawat kasa sehingga hewan gurita tidak dapat melarikan diri.

3. Tempat Persembunyian
Lengkapi interior atau bagian dalam akuarium tempat pemeliharaan dengan gua buatan sebagai tempat persembunyian agar ia merasa seperti di alam aslinya. (Baca juga mengenai cara memilih ikan koi yang bagus)


4. Pengaturan Pencahayaan
Hewan gurita biasanya tinggal di dasar laut. Jadi ia tidak membutuhkan cahaya dalam jumlah yang cukup banyak. Pencahayaan secara maksimal justru akan membuatnya menjadi stres. Atur pencahayaan sedemikian rupa agar jangan

terlalu terang dan jauhkan akuarium dari sinar matahari langsung ya sobat. Sebagai binatang pemalu, hewan gurita juga akan tetap diam apabila berada di lingkungan yang ramai. 

5. Kebutuhan Pakan
Sobat bisa memberikan hewan gurita pakanan berupa hewan kepiting kecil. Hewan kepiting kecil yang dipakai disarankan masih hidup, lalu dimasukkan langsung ke akuarium tempat pemeliharaan supaya hewan gurita dapat menangkapnya sendiri.

Sobat juga bisa memberikan variasi pakanan yaitu udang dan ikan ikan laut kecil. Sesekali Sobat pun dapat memberikannya timun yang telah direbus. Berikan pakanan ini setiap malam dan dini hari karena hewan gurita adalah binatang nokturnal. 

6. Waktu Pemberian Pakan
Alternatif lain pakanan hewan gurita yang dipelihara di dalam akuarium tempat pemeliharaan adalah cacahan daging udang kecil, cacing beku, dan sesekali sobat bisa memberikan potongan mentimun layu (mentimun yang disiram

air panas terlebih dahulu). Pakanan untuk hewan gurita yang dipelihara dalam akuarium tempat pemeliharaan tersebut bisa diberikan setiap pagi, sore, dan malam hari karena hewan gurita adalah hewan nokturnal atau hewan yang aktif di malam hari.

7. Kebersihan Akuarium
Agar hewan gurita milik Sobat dapat tumbuh dengan sehat, Sobat harus menjaga kebersihan akurium tempat tinggalnya. Ganti setengah volume air laut yang ada di dalam tangki setiap 2 minggu sekali. Pasanglah alat aerator dan filtrasi yang berguna untuk menjaga kebersihan akuarium tempat pemeliharaan. Segera ambil sisa pakanan yang mengendap di dasar tangki sebelum mencemari air.

8. Hindarkan dari Air Kotor
Kebersihan air di dasar dalam akuarium tempat pemeliharaan juga hendaknya dijaga. Kematian hewan gurita yang dipelihara di dalam akuarium tempat pemeliharaan rata rata karena kondisi media air tempat memelihara hewan gurita sudah kotor.

9. Cara Perkawinan
Jika ingin memperbanyak hewan hewan gurita yang sobat, pelihara, sobat bisa memelihara hewan hewan gurita berjenis kelamin jantan dan betina. Hewan bertentakel ini menggunakan isyarat kimia untuk mencari pasangannya.

Tapi saat bertemu, hewan gurita jantan langsung ekstra waspada karena meski bukan hewan pemilih, hewan gurita betina akan memakan pasangannya setelah mereka berhubungan, sehingga sobat harus segera memisahkan mereka setelah kawin. Saat reproduksi, hewan gurita jantan akan menyisipkan penis hewan gurita betina, ke rongga mantel betina.

Organ yang juga biasa disebut sebagai lengan ketiga hewan gurita ini akan lepas dengan sendirinya saat sudah masuk ke dalam organ vital hewan gurita betina. Lengan ketiga ini menyimpan sekantung sperma. Saat itulah sobat harus segera memisahkannya agar hewan gurita jantan tidak dimakan oleh hewan gurita betina.

10. Pencegahan Hama
Hindarkan akuarium tempat pemeliharaan hewan gurita dari penyakit dengan cara menjaga kebersihannya ya sobat, miliki alat kebersihan yang lengkap sebab jika di dalam akuarium tempat pemeliharaan terdapat lumut atau bakteri akan mudah membuatnya stres dan mati.

Minggu, 03 Februari 2019

KULIT TELUR TERNYATA BERMANFAAT AGAR MERPATI SEHAT DAN KUAT


Memelihara burung dengan jenis tertentu sudah merupakan hobi yang sejak dulu berkembangan menjadi gaya hidup di masyarakat. Merpati menjadi salah satu jenis burung yang banyak diperlihara oleh masyarakat yang umumnya pedesaan. Memelihara merpati tentu harus dilakukan dengan mempertimbangkan banyak hal yang salah satunya adalah makanan atau pakan yang diberikan kepada burung tersebut akan menentukan kesehatan dari burung. 

terkait manfaat kulit telur untuk burung merpati melalui penjelasan di bawah ini.

Kandungan Nutrisi Cangkang Atau Telur

Kulit telur atau cangkang telur baik itu telur puyuh, telur ayam, telur itik, dan jenis telur lainnya yang memiliki kulit luar seringkali tidak termanfaatkan dan menjadi bahan yang pasti akan dibuang dalam proses pengolahan telur menjadi berbagai macam jenis makanan. Cangkang telur padahal dapat dimanfaatkan sebagai pakan burung yang memiliki banyak manfaat dengan kandungan nutrisi di dalam cangkang telur tersebut yang paling terbesar adalah kalsium dan berbagai macam jenis mineral lainnya.

Manfaat Kulit Telur Untuk Burung Merpati

Penggunaan cangkang telur untuk burung merpati sudah banyak dipahami dan diketahui oleh para pemilik burung. Kandungan nutrisi yang terdapat di dalam cangkang atau kulit telur tersebut menjadi dasar dari adanya beberapa manfaat yang bisa diperoleh jika burung diberi pakan kulit telur. Berikut ini beberapa manfaat kulit telur untuk burung merpati yang perlu dipahami diantaranya sebagai berikut ini.

Sumber kalsium, kandungan kalsium yang tinggi di dalam cangkang atau kulit telur menjadikannya sebagai salah satu jenis pakan burung yang dapat dimanfaatkan untuk sumber kalsium bagi tubuh burung yang tentunya merupakan mineral penting.

Sebagai grit, pakan utama burung merpati biasanya adalah biji bijian dengan cangkang yang keras dan enzim pencernaan burung tersebut sulit untuk mengelupasnya. Grit merupakan sebutan untuk jenis pakan tambahan yang diberikan kepada burung merpati dengan manfaat membantu proses pengelupasan cangkang biji bijian bagi burung. Salah satu grit tersebut yang sering digunakan adalah kulit telur ayam.

Membantu proses pembentukan tulang, kalsium tentu memiliki peran yang bagus di dalam tubuh burung merpati. Salah satu bentuk peran nutrisi yang terdapat di dalam kulit telur tersebut adalah membantu proses pembentukan tulang dan proses pertumbuhan serta perkembangan anakan burung merapti dengan baik.

Membantu proses pembentukan telur, kulit telur yang digunakan sebagai bahan pakan untuk burung merpati juga sangat cocok manfaatnya dalam proses pembentukan telur yang sedang terjadi pada burung merpati betina. Kandungan kalsium yang menjadi dasar manfaat kulit telur tersebut untuk membuat telur burung betina memiliki kualitas yang baik.

Membantu proses pembentukan paruh, paruh menjadi salah satu bagian penting dari tubuh burung merpati yang harus terbentuk dengan baik terutama bagi burung muda. Kandungan kalsium di dalam kulit telur selain membantu proses pembentukan tulang juga berguna dalam membantu proses pembentukan paruh.

Jumat, 01 Februari 2019

Hellebores

by Cherie Luke
Hellebores, (helleborus spp.) is a long lived perennial in the buttercup, Ranunclaceae,
family. About 20 species belong to this genus.  Hellebores have leathery, usually dark green leaves, divided into lobes on leaflets that are often toothed. The flowers come in a wide range of colors including black, yellow, cream, purple, green, red, and rose. The flowers are not true petals, but petal-like sepals.
Hellebore Leaves
Plant hellebores in light to full shade with rich evenly moist, well drained soil. They are
mildly drought tolerant once established. A sheltered area protected from winter winds
will help keep evergreen foliage looking best. You should remove any dead foliage
around January if not covered in snow.

Hellebores are deep rooted and do well when planted in deeply dug holes with a yearly
top dressing of compost, being careful not to bury the crown.  They do not need regular dividing for the health of the plant but if you want to divide or move one it is best to do it in September or October.

All parts of the plant are poisonous if ingested, and the sap from bruised leaves can
cause a skin rash in some people.

Hellebore Flower
Hellebores are the first plants to bloom in my garden each year around mid March.
They are deer and rabbit resistant and can be an early source of nectar for bees. Many
of the new varieties have outward facing flowers so they can be enjoyed more easily by
the gardener, but hellebores with downward facing flowers are better able to keep the
plants nectar dry.

Most are hardy in zones 4-9 depending on the particular species.
For more information check out Perennial Gardening Fact Sheet: Herbaceous
Perennials – 7.405 and Plant Talk 1017, Perennials: When and How to Plant

RAHASIA PEMBIBITAN DURIAN DARI BIJI AGAR HASIL MEMUASKAN

https://tipspetani.blogspot.com/2019/02/rahasia-pembibitan-durian-dari-biji.html
RAHASIA PEMBIBITAN DURIAN DARI BIJI AGAR HASIL MEMUASKAN

Durian terbaik adalah durian yang kita suka dan sudah kita ketahui kenikmatan rasanya. Namun saat kita membeli bibit, kita hanya percaya saja pada para penjualnya bahwa bibit yg kita beli adalah bibit yang sesuai dengan harapan kita. Pada kenyataannya, bisa saja seorang penjual salah identifikasi, karena setiap pohon bibit belum tentu di beri tag atau label yang benar, atau bahkan tidak diberi label sama sekali. Kenyataan itu baru kita ketahui setelah betahun tahun kita rawat durian yg kita beli tadi, hingga berakhir dengan kekecewaan.

Buat para pemula, ini ada sedikit rahasia dari para kolektor kebun durian yang sempat saya simak dalam sebuah diskusi dengan mereka.

Saya tulis saja langkah-langkahnya agar kita semua bisa saling melengkapi jika ada uraian saya yang kurang tepat.

1. Saat menyantap durian, dan anda merasakan nikmatnya seketika saat suapan pertama, berarti anda telah menemukan durian idaman.

2. Nikmati dagingnya yang lezat, dan kumpulkan bijinya yang bentuknya bulat berisi. Jika ada yang kempis, buang saja, biasanya jenis tertentu banyak bijinya yang kempis, tapi selalu ada yg bulat, baik yg ukuran kecil, sedang ataupun besar.

3. Biji pilihan tadi, dibersihkan dan dibungkus dalam kertas atau tisu yg agak lembab, lalu bungkus dengan plastik, dan bawa pulang kerumah untuk di semai.

4. Dalam waktu 4-8minggu, biji-biji dari buah durian pilihan tadi sudah bersemi dan akan terlihat segar dan subur. Pilih yang paling besar dan banyak daunnya, karena ini menandakan bibit yang sehat dan kuat.

5. Pada saat yang sama, bisa disiapkan batang bawahnya, berupa pohon bibit durian yang berasal dari tanaman lokal, karena tanaman lokal sudah memiliki kemampuan adaptasi yang baik dengan iklim dan kondisi tanah setempat.

6. Setelah usia tanaman bibit tadi mencapai 3-6bulan, ambil entres dari batang atau cabangnya yang paling subur, buang sebagian daunnya, sisakan sedikit unt kebutuhan fotosintesis, lalu lakukan penyambungan sisip durian unggulan tadi pada batang bawah yang sudah cukup besar, dan kalo bisa batang bawahnya berjenis monthong yang genjah dan sudah punya kaki ganda supaya bisa cepat besar.

7. Rawat bibit sampai ukuran 1.5m dan tanam di kebun. Prosesnya sampai siap belajar berbuah perlu waktu sekitar 5-7 tahun, namun perhatikan saja ukuran batang utama. Jika batang utama sudah berukuran diatas 10cm, dan dahan primernya yang horisontal sudah mencapai diameter 3-6cm serta memiliki daun yang cukup lebat, maka dengan pemupukan yang sesuai, biasanya sudah bisa belajar berbuah.

Percepatan untuk berbuah

Sebenarnya ada cara untuk membuat bibit durian yang dibuat dari biji ini untuk bisa segera berbuah dalam kurun waktu 3-5tahun. Mmhh… sebenarnya terdengar terlalu optimis ya, tapi ini lah yang dipraktekkan oleh para peneliti, untuk bisa segera menemukan bibit unggul dari hasil kawin silang, beberapa jenis unggulan. Maklumlah, rata-rata usia durian untuk siap berbuah, bisa makan waktu 7-12 tahun jika dirawat dari biji sampai siap berbuah. Bisa bisa para peneliti terlanjur lanjut usia sebelum bisa benar benar mendapatkan bibit yang sesuai untuk diperbanyak. Itu sebabnya rahasia ini hanya dipraktekkan di kalangan peneliti untuk bisa mendapatkan hasilnya dengan cepat.

coba kita simak.

1. Biji dari buah durian yang dianggap unggul, akan disemai dengan root stock lokal, dan tehnik sambung akar sampai memiliki cabang dan tunas yang cukup banyak.

2. Pilih batang bawah jenis durian monthong yang terkenal genjah dan mudah berbuah sebagai batang bawah yang siap menjadi interstock yakni punya batang bawah lokal, dan batang atasnya monthong. Pilih yang usia sudah 2 tahun atau lebih.

3. Jika sudah punya pohon durian dikebun, tentu akan lebih baik lagi. Pilih pohon yang produksinya kurang disuka, untuk digunakan sebagai batang bawah.

4. Pilih posisi 1m dari permukaan tanah sebagai titik penempatan topworking dari batang bibit unggulan dan siapkan proses seperti okulasi atau sambung pucuk, dengan memanfaatkan batang yang tumbuh vertikal.

5. Buat beberapa titik penyambungan untuk mengurangi risiko kegagalan dari proses ini, sehingga jika ada yang gagal, masih ada cadangan lain yang bisa tumbuh.

6. Saat sudah selesai, tutup bagian tanaman batang interstock yang terluka denga lilin atau cat agar tidak terinfeksi penyakit.

7. Tutup dengan plastik supaya kondisi kelembaban dari tunas yang di tanam pada batang besar tetap terjaga.

8. Lihat 1 bulan kemudian, dan rawat sebaik baiknya. Setelah 2-3bulan, tunas yang paling lebat bisa dipilih sebagai bakal bibit unggul dan siap berbuah dalam waktu yg lebih singkat, karena sistem perakaran yang sudah lebih tua, akan mendorong tunas dari bibit unggul tadi untuk berkembang cepat.

Nah cara diatas bisa mempercepat proses pendewasaan durian unggul yang diperoleh dari biji, karena dengan batang bawah yang sudah besar, maka supply nutrisi kepada batang atas akan sangat bagus, sehingga akan mengalami pertumbuhan sangat cepat.

Semoga cara-cara ini bisa membantu kita semua mempercepat proses produksi tanaman dan bagi yang punya pohon durian dewasa atau sudah tua, bisa meremajakan tanaman dengan bibit unggul yang memang sudah pernah dirasakan sendiri buahnya, dan tidak lagi harus khawatir tertukar dengan bibit lainnya, karena kita sendiri yang mengerjakannya


https://tipspetani.blogspot.com/2019/02/cara-membuat-bibit-durian-dengan-sistem.html

Beranda pertanian masa kini